
Wondering how to take a screenshot on a laptop without installing extra software? Whether you use a Windows 11 or Windows 10 laptop, taking screenshots is incredibly easy once you know the right keyboard shortcuts and built-in tools.
Windows includes several screenshot methods for different situations. You can capture your entire screen, a specific window, a selected area, or even schedule delayed screenshots using the Snipping Tool. There’s also a built-in screen recorder if you want to capture videos instead of images.
In this complete guide, you’ll learn every way to take screenshots on a laptop, along with keyboard shortcuts, tips, troubleshooting steps, and the best method for different users.
How to Take Screenshot in Laptop – Different Methods
Windows offers multiple screenshot methods depending on what you want to capture.
You can capture:
- Entire screen
- Active application window
- Selected area
- Free-form shape
- Delayed screenshots
- Screen recordings
Let’s explore each method in detail.
Method 1: Use Windows + Print Screen (Fastest Method)
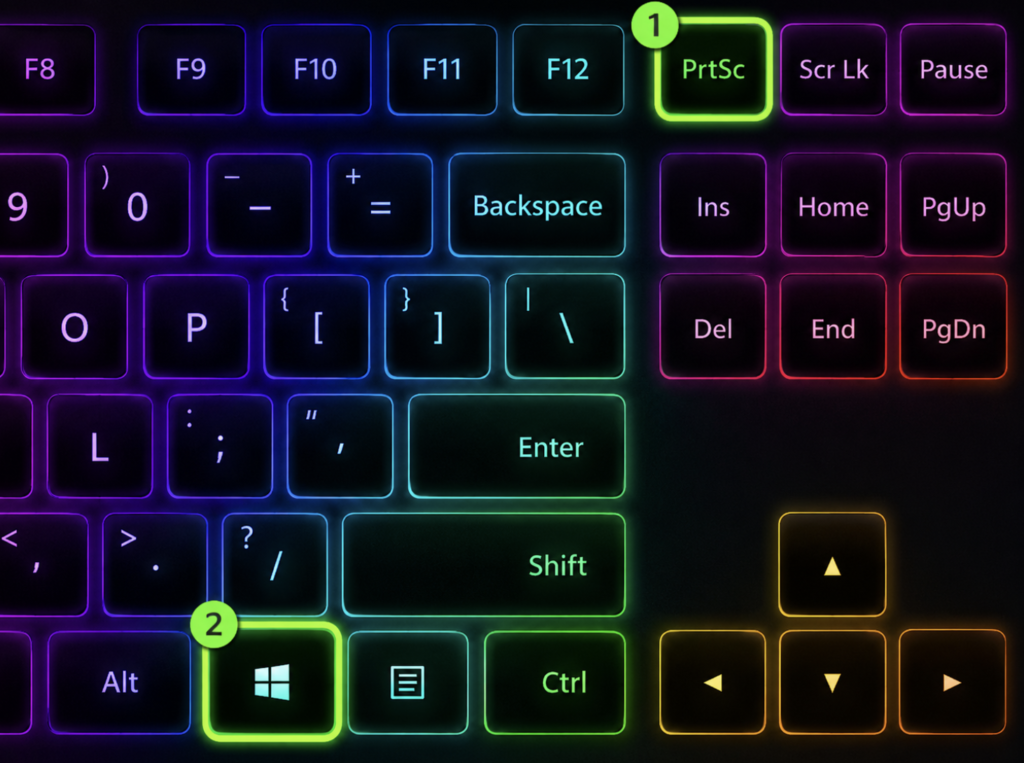
If you simply want to capture your entire screen and save it instantly, this is the easiest option.
STEPS
- Open the screen you want to capture.
- Press Windows + Print Screen (PrtSc) together.
- Your screen will briefly dim, indicating that the screenshot has been taken.
- Windows automatically saves the image.
Screenshot Location
This is the fastest option because you don’t need to paste the screenshot anywhere.
Method 2: Use the Print Screen Key
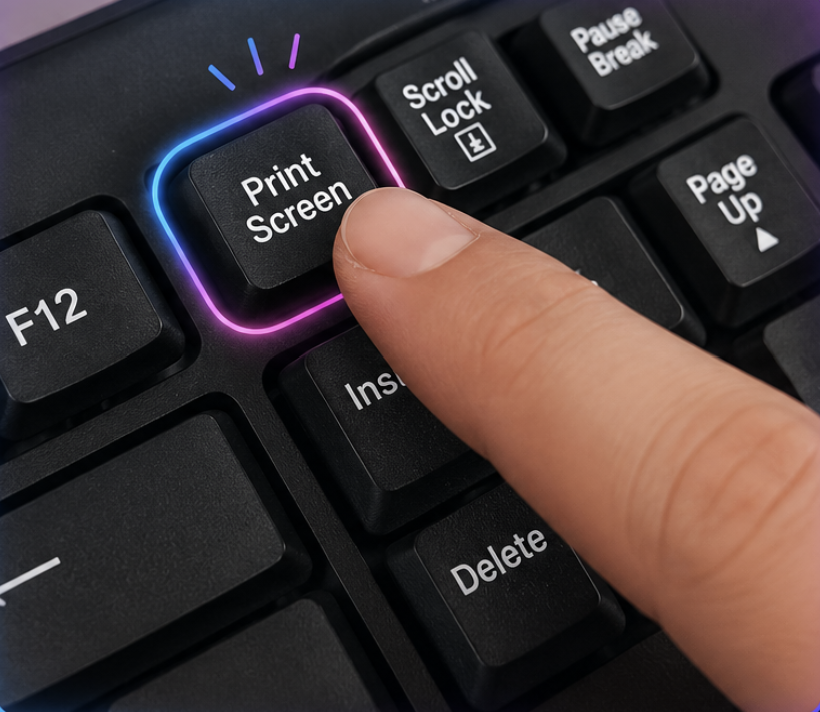
Another common way is simply pressing the Print Screen key.
Unlike the previous method, this does not save the image automatically.
Instead, it copies the screenshot to your clipboard.
Steps
- Press PrtSc.
- Open Paint, Microsoft Word, Outlook, or any image editor.
- Press Ctrl + V.
- Save the image manually.
This method is useful when you want to quickly paste a screenshot into an email or document.
Method 3: Capture Only the Active Window
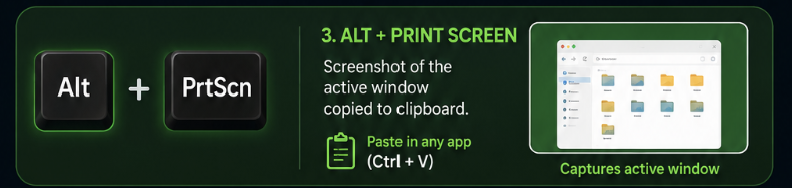
Sometimes you don’t want to capture your entire desktop.
Instead, you may only need one application window.
Shortcut
Alt + Print Screen
Steps
- Click on the window you want.
- Press Alt + PrtSc.
- Open Paint or Word.
- Press Ctrl + V.
- Save the screenshot.
This avoids capturing unnecessary desktop clutter.
Method 4: Use the Snipping Tool (Recommended)
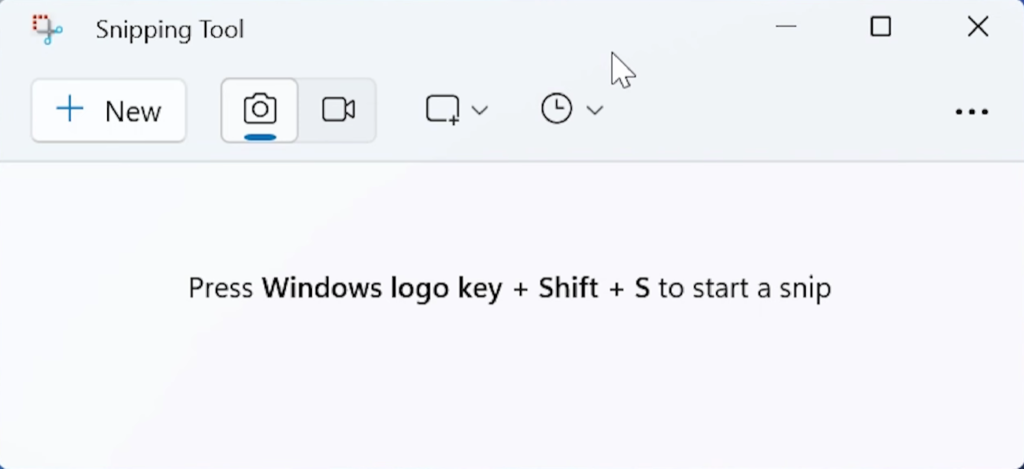
The Snipping Tool is Microsoft’s built-in screenshot utility and one of the best ways to capture exactly what you need.
Shortcut
Windows + Shift + S
When you press these keys together, a small toolbar appears at the top of your screen.
Snipping Tool Modes
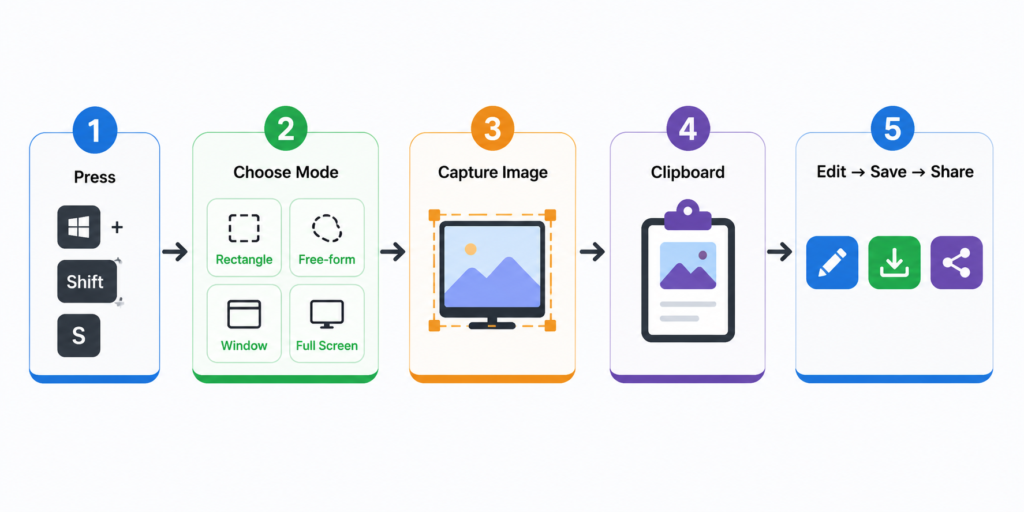
Rectangle Snip
This is the most commonly used mode.
Simply drag your mouse over the area you want to capture.
The screenshot is copied to your clipboard, and a notification appears. Click it to edit in the Snipping Tool.
Free-form Snip
Need to capture an irregular shape?
Choose Free-form Snip and draw around the object using your mouse.
Everything inside the outline is captured.
This is useful for designers, teachers, or presentations.
Window Snip
If you have multiple applications open, Window Snip allows you to capture only one of them.
Click the desired window, and Windows instantly captures it.Full-Screen Snip
Works similarly to the Print Screen key but opens the result inside the Snipping Tool for editing.
Method 5: Take Delayed Screenshots
Sometimes menus disappear before you can capture them.
That’s where delayed screenshots come in.
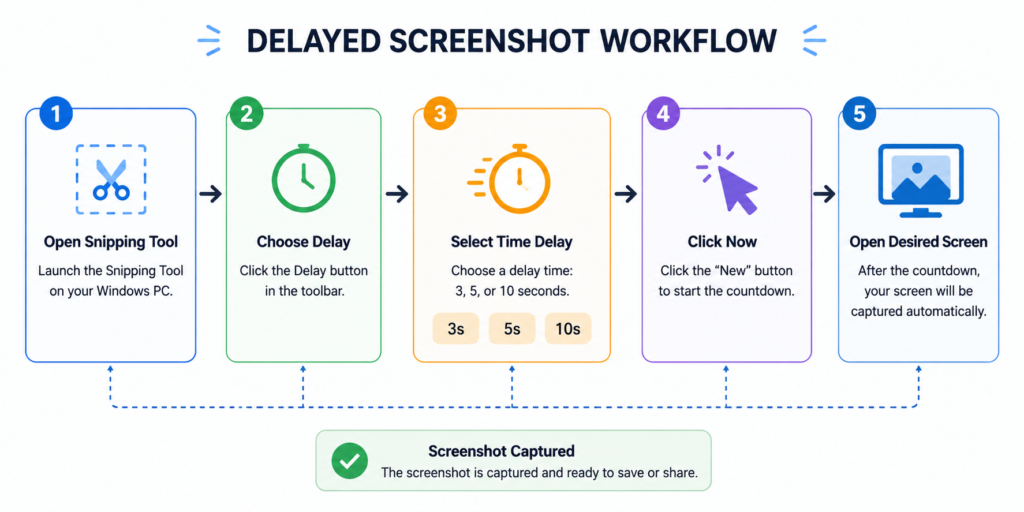
Open Snipping Tool from the Start menu.
You’ll see three timer options:
- 3 Seconds
- 5 Seconds
- 10 Seconds
Choose a delay, click New, and quickly switch to the screen you want to capture.
Once the timer ends, Windows lets you take your screenshot.
This feature is perfect for capturing the following:
- Drop-down menus
- Right-click menus
- Tooltips
- Context menus
- Pop-up windows
Delayed Screenshot
Method 6: Edit Screenshots
After capturing a screenshot, Windows automatically opens the image inside the Snipping Tool (if you click the notification).
Here you can:
- Highlight text
- Draw
- Crop images
- Add shapes
- Write notes
- Save as PNG, JPG, or GIF
- Share directly
This eliminates the need for third-party editing software for basic markup.
Method 7: Automatically Save Screenshots
If you’re tired of pasting screenshots into Paint or another app every time, Windows lets you automatically save screenshots directly to your computer.
Enable Automatic Screenshot Saving
- Open the Snipping Tool app.
- Click the Settings icon.
- Turn on Automatically save original screenshots.
Now, every screenshot you capture with the Snipping Tool will be saved automatically, making it much easier to manage multiple screenshots.
Benefits
- No need to save screenshots manually.
- Keeps screenshots organized.
- Ideal for students, bloggers, and professionals.
Method 8: Use Print Screen to Open Snipping Tool

Windows also allows you to replace the traditional Print Screen function with the Snipping Tool.
Instead of copying your screen directly to the clipboard, pressing PrtSc will instantly launch the screenshot toolbar.
How to Enable It
- Open Settings.
- Go to Accessibility.
- Select Keyboard.
- Turn on Use the Print Screen button to open screen capture.
Once enabled, pressing PrtSc behaves exactly like pressing Windows + Shift + S.
This is one of my favorite Windows features because it removes the need to remember multiple shortcuts.
Method 9: Take Screenshots with Xbox Game Bar
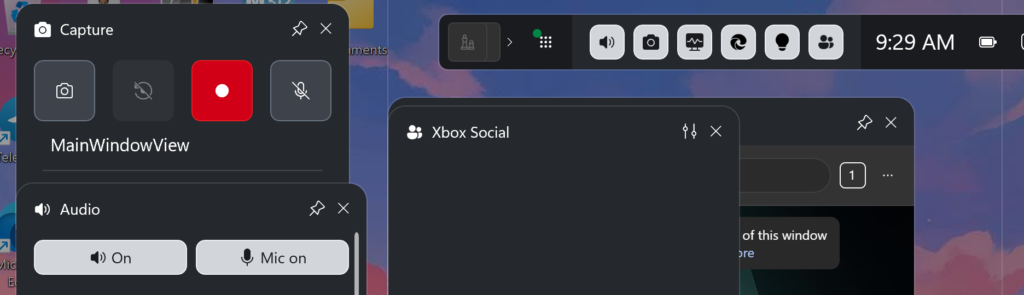
If you’re a gamer or want to capture apps running in full-screen mode, the Xbox Game Bar is a great built-in tool.
Shortcut
Windows + G
This opens the Xbox Game Bar overlay.
Click the camera icon to capture a screenshot.
Your screenshots are automatically saved in:
Xbox Game Bar works especially well for:
- PC games
- Gameplay screenshots
- Full-screen applications
Method 10: Record Your Screen
Windows 11 also includes a built-in Screen Recorder inside the Snipping Tool, allowing you to record your screen without downloading extra software.
Alternatively, you can use the Xbox Game Bar.
Shortcut
Windows + Alt + R
Press the shortcut again to stop recording.
Videos are saved in the Captures folder.
This feature is useful for:
- Creating tutorials
- Recording presentations
- Demonstrating software
- Capturing gameplay
Where Are Screenshots Saved?
The location depends on which screenshot method you use.
| Screenshot Method | Save Location |
|---|---|
| Windows + PrtSc | Pictures → Screenshots |
| Snipping Tool | Clipboard or chosen folder |
| Xbox Game Bar | Videos → Captures |
| Print Screen | Clipboard |
If you can’t find a screenshot, check your clipboard history by pressing Windows + V (if clipboard history is enabled).
Windows 10 vs Windows 11 Screenshot Features
| Feature | Windows 10 | Windows 11 |
|---|---|---|
| Snipping Tool | ✅ | ✅ (Redesigned) |
| Delayed Screenshot | ✅ | ✅ |
| Screen Recording | ❌ | ✅ |
| Xbox Game Bar | ✅ | ✅ |
| Automatic Save | ✅ | ✅ |
Windows 11 improves the Snipping Tool with a cleaner interface and built-in screen recording, making it the better choice for most users.
How to Take Screenshot in Laptop – (Shortcut)
| Shortcut | Function |
|---|---|
| Win + PrtSc | Save full-screen screenshot |
| PrtSc | Copy full screen to clipboard |
| Alt + PrtSc | Capture active window |
| Win + Shift + S | Open Snipping Tool |
| Win + G | Open Xbox Game Bar |
| Win + Alt + R | Start/Stop screen recording |
| Ctrl + V | Paste screenshot |
Troubleshooting Screenshot Problems
If screenshots aren’t working, try these fixes:
1. Check the Print Screen Key
Some laptops require you to press the following:
Fn + PrtSc
instead of just PrtSc.
2. Restart Windows Explorer
Open Task Manager, locate Windows Explorer, and click Restart.
3. Update Windows
Go to:
Settings → Windows Update
Install any pending updates, as they often fix keyboard and Snipping Tool issues.
4. Check Keyboard Settings
Ensure the use of the Print Screen button to open screen capture option is enabled if you want the Snipping Tool shortcut.
5. Reset the Snipping Tool
Go to:
Settings → Apps → Installed Apps → Snipping Tool → Advanced Options
Choose Repair or Reset if the app isn’t working correctly.
How to Take Screenshot in Laptop- Quick Summary
| Method | Shortcut | Automatically Saves | Best For |
|---|---|---|---|
| Windows + Print Screen | Win + PrtSc | ✅ Yes | Full screen |
| Print Screen | PrtSc | ❌ Clipboard | Quick copy |
| Alt + Print Screen | Alt + PrtSc | ❌ Clipboard | Active window |
| Snipping Tool | Win + Shift + S | ❌ Clipboard | Selected area |
| Snipping Tool App | Search “Snipping Tool” | Optional | Editing & delay |
| Xbox Game Bar | Win + G | ✅ Yes | Games |
| Screen Recorder | Win + Alt + R | ✅ Yes | Video recording |
Frequently Asked Questions
How do I take a screenshot on my laptop?
The quickest way is to press Windows + Print Screen. Your screenshot is automatically saved to the Pictures → Screenshots folder.
How do I capture only one window?
Click the window you want to capture and press Alt + Print Screen. Paste the image into Paint, Word, or another app to save it.
Where are screenshots saved in Windows?
Screenshots taken with Windows + Print Screen are saved in the Pictures → Screenshots folder. Xbox Game Bar screenshots are stored in Videos → Captures.
Can I take delayed screenshots?
Yes. Open the Snipping Tool, choose a 3-second, 5-second, or 10-second delay, then click New to start the countdown.
Can Windows record my screen?
Yes. Windows 11 includes screen recording in the Snipping Tool, and both Windows 10 and Windows 11 support recording through the Xbox Game Bar.
Final Verdict
Learning how to take screenshot in laptop is a useful skill for students, professionals, gamers, and everyday users. Windows offers several built-in methods, from quick keyboard shortcuts to the powerful Snipping Tool and Xbox Game Bar, so there’s no need to install third-party software for most tasks.
If you simply want to capture your entire screen, Windows + Print Screen is the fastest option. For more control, Windows + Shift + S opens the Snipping Tool, allowing you to capture specific areas, windows, or free-form selections. And if you need to record your screen instead of taking a static image, Windows’ built-in screen recording tools have you covered.
By using the method that best fits your workflow, you can save time and make capturing information on your laptop much more efficient.